Quick Start
Use this section as a high-level orientation before working through the detailed procedure chapters.
Typical Workflow
Acquisition
Launch the Vimotis Lab App.
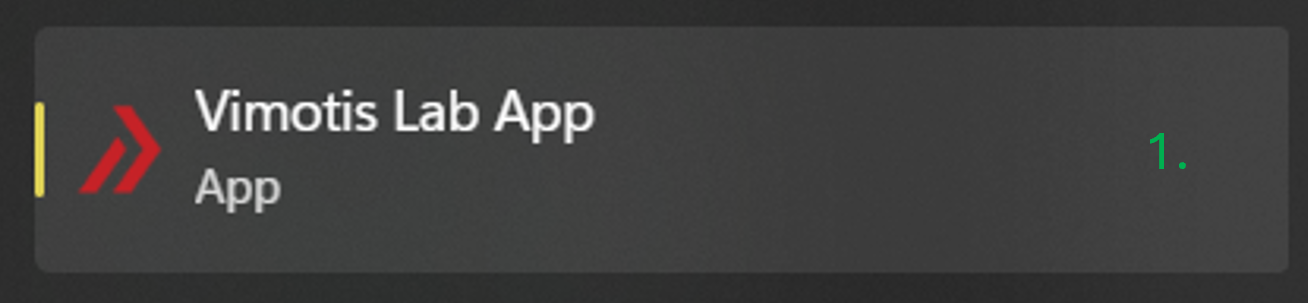
Figure 1: Launch the app. Hardware connected before launch
- If the hardware is already connected, the software will launch in Acquire mode.
Hardware connected after launch
- Choose Mode > Acquire.
- Plug in the hardware USB.
- Choose File > Reconnect.
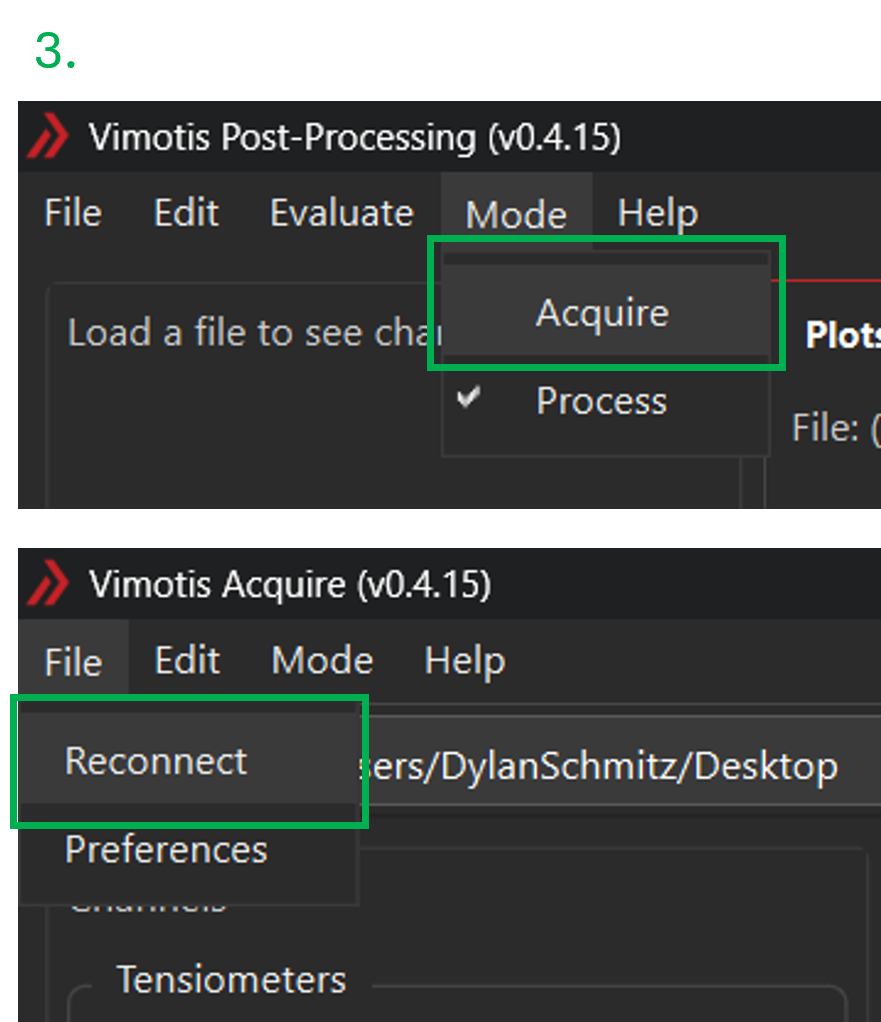
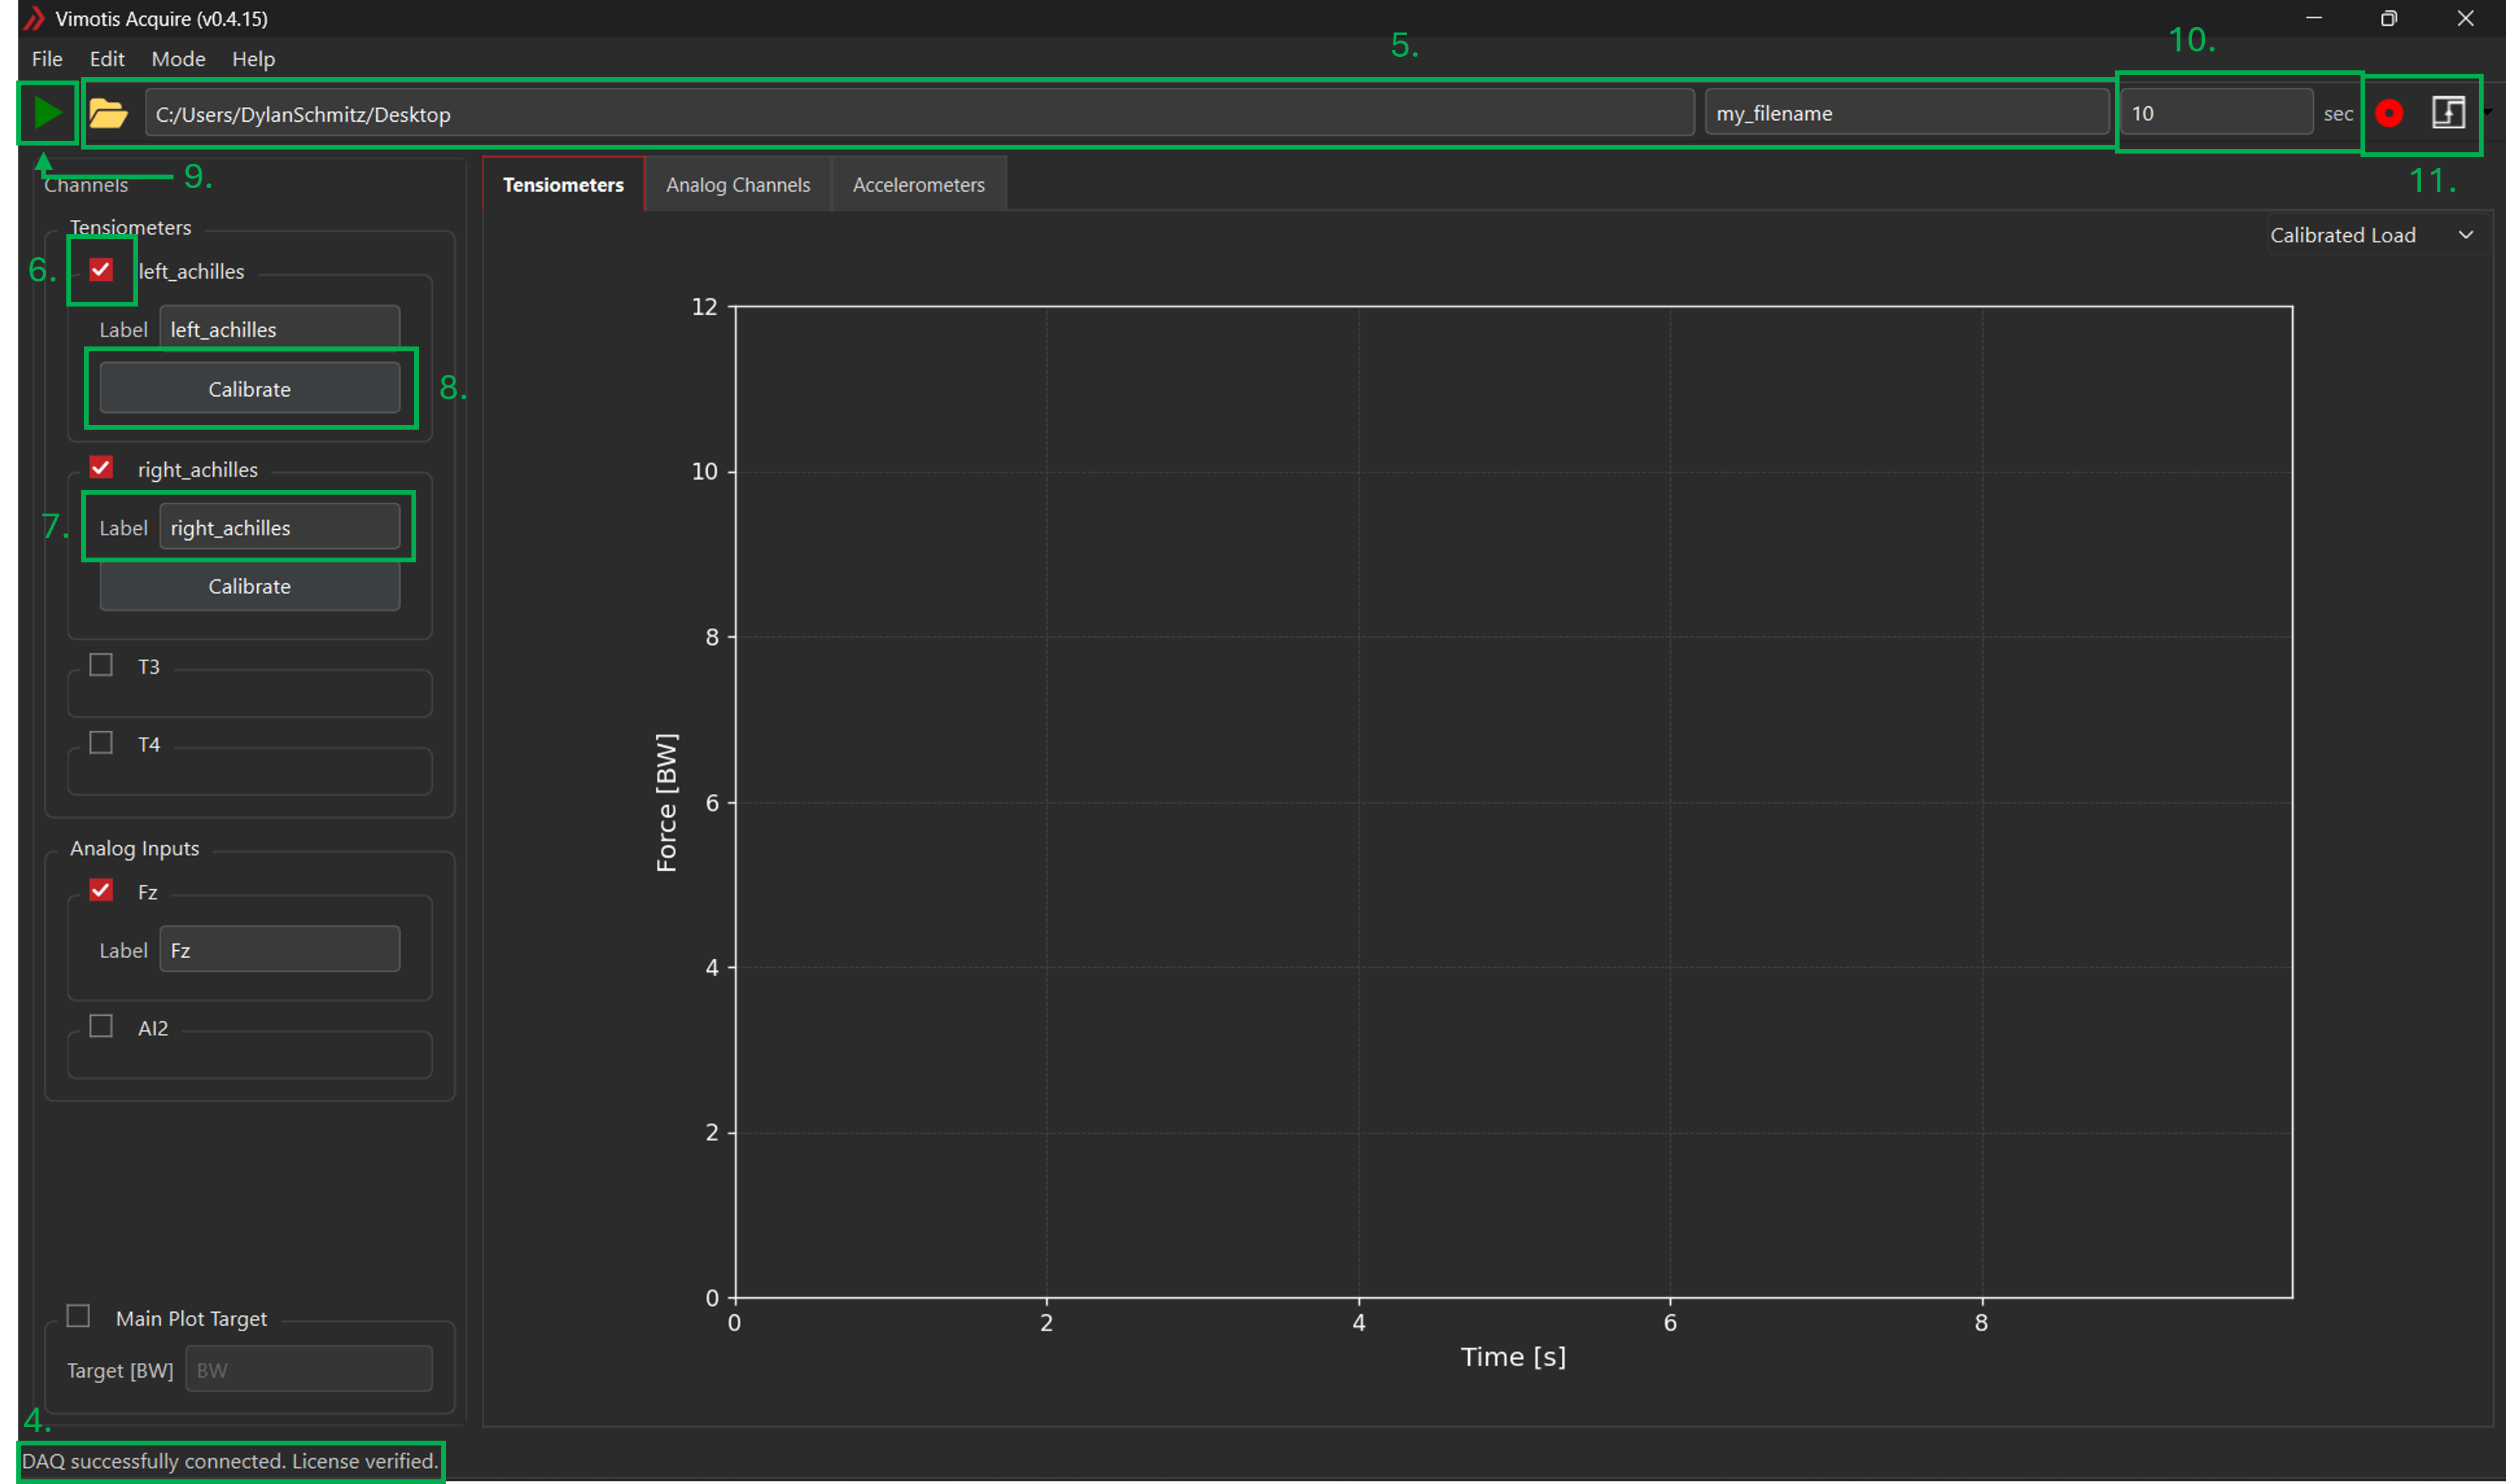
Figure 2: Connect to the hardware. - Ensure the hardware is detected. A message will display in the bottom-left corner.
- Choose a storage location and enter a file name.
- Select the desired tensiometer and analog input channels.
- The default channel names are
T1-T4andAI1-AI2. Label the channels according to the matching tendon or signal as desired; these labels will persist for future identification in reprocessing and export workflows. Tensiometer calibration
- For each tensiometer channel, choose Calibrate which will open the calibration dialog. Alternatively, choose Edit > Calibration.
- Perform the calibration task for each tensiometer in use (see Calibration).
- Start the sensor acquisition using the green arrow in the upper-left area of the screen and review the load traces.
- Enter the desired collection duration.
- Begin the collection using the red record button in the upper left area of the screen. Alternatively, the system may be triggered with a rising or falling edge input on the SYNC input (see Acquire Mode for more details).
Post-Processing
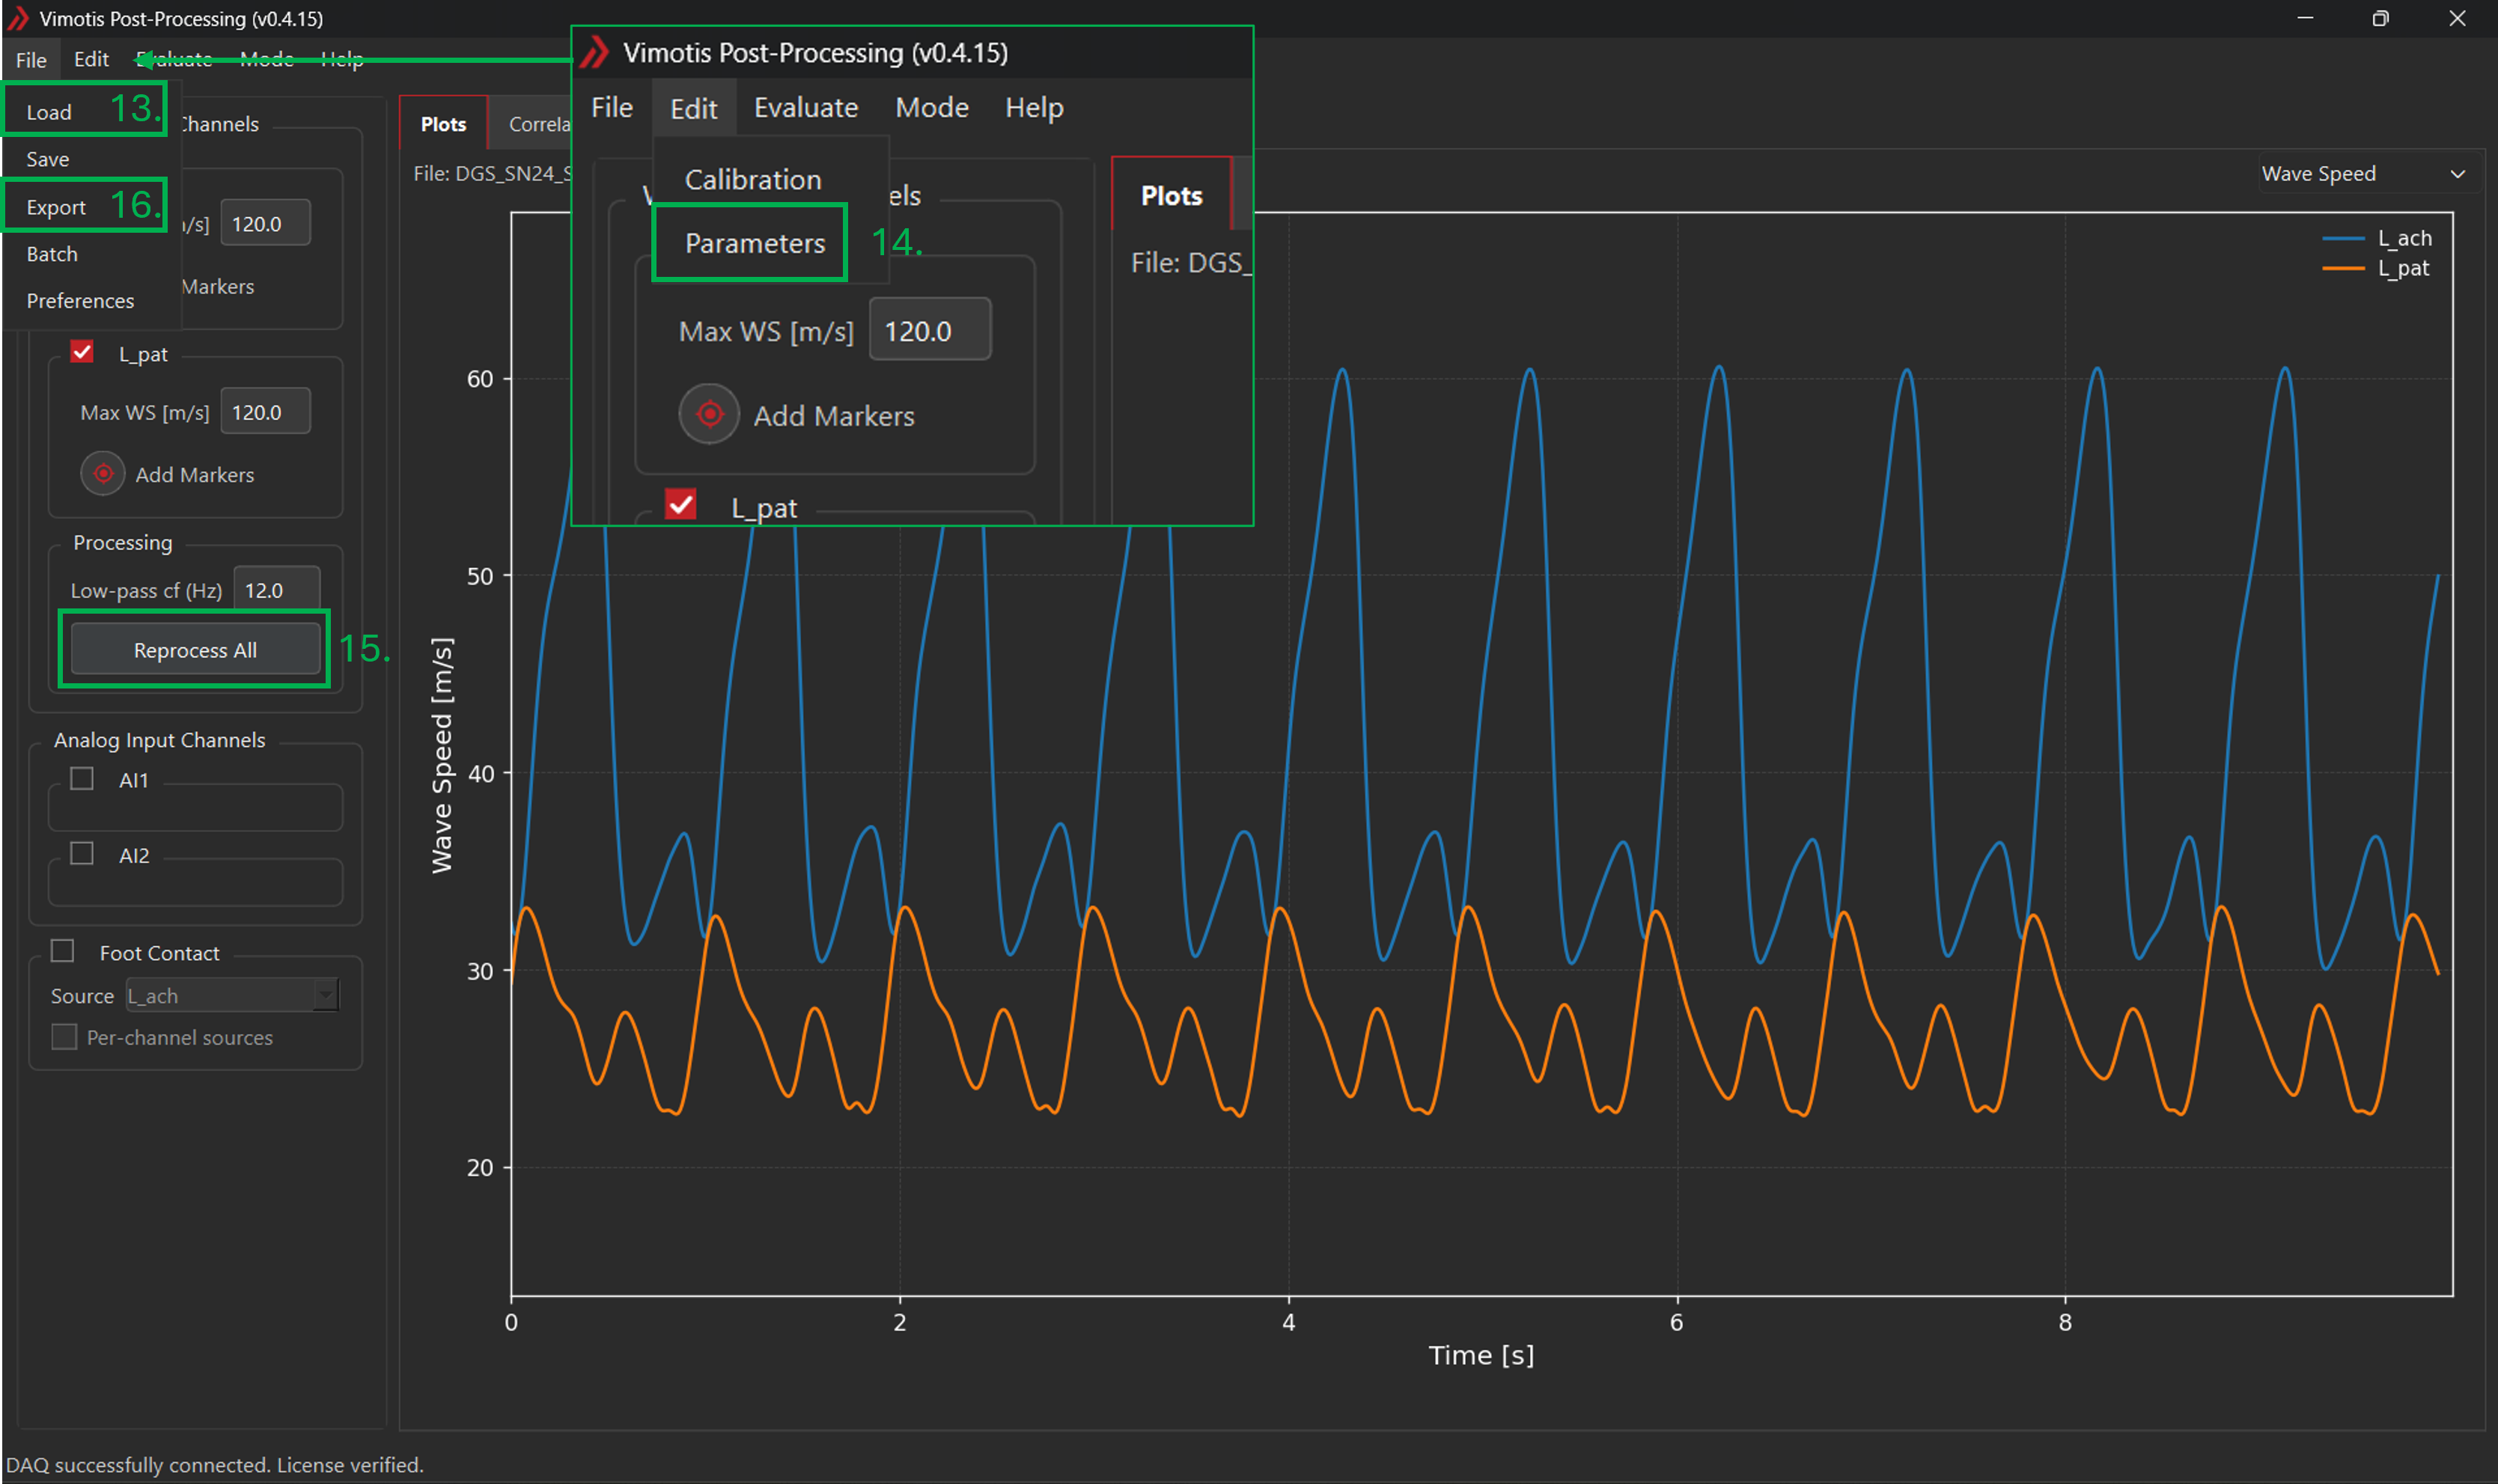
- Choose Mode > Process.
- Load the recorded dataset using File > Load.
- Review processing parameters, calibration, and plotted channels.
- Choose "Reprocess all".
- Export desired data for analysis by choosing File > Export and following the prompts.
Always post-process tensiometer data before detailed analysis or exporting. The processing algorithms which allow for live data display are less robust than those used to post-process the data.
Before Collecting Study Data
- Verify the active software version and review the release notes.
- Confirm calibration settings and the planned acquisition setup.
- Confirm the selected save folder and naming convention.
- Run a short test recording and process it before collecting formal study data.
- Confirm exported values and plots match expectations for your setup.